 Getting people to sign up for your mailing list is imperative to your online growth – whether you are a musician, artist, or business. Social Media accounts like Twitter, Instagram, and Facebook are also very important. But don’t overlook the incredible value that an email list can have – especially when the people on your email list WANT to get emails from you.
In this post, I’m going to show you a quick and easy way to set up an email sign-up form (using MailChimp.com) which will trade a file download (song, zip file, video, or even just a URL to a secret video) for a user joining your email list.
We’re also going to use the “Double Opt-In” feature with MailChimp so we KNOW that people really want to hear from us – and then we don’t have to feel like spammers when we send out emails 🙂
Following these steps should take you about an hour:
Step 1.
Get a free MailChimp account by signing up at https://mailchimp.com
Step 2.
Buy our MP Stacks + Mailchimp plugin for $5 here. Once you’ve purchased the plugin, download it and then install it on your WordPress on the “Plugins” > “Add New” > “Upload” page in your Dashboard.
Step 3.
Choose the page you want to place the email sign-up on. Maybe this is your home page, or maybe your footer. Edit that page by going to “Pages” in your WordPress Dashboard.
Step 4.
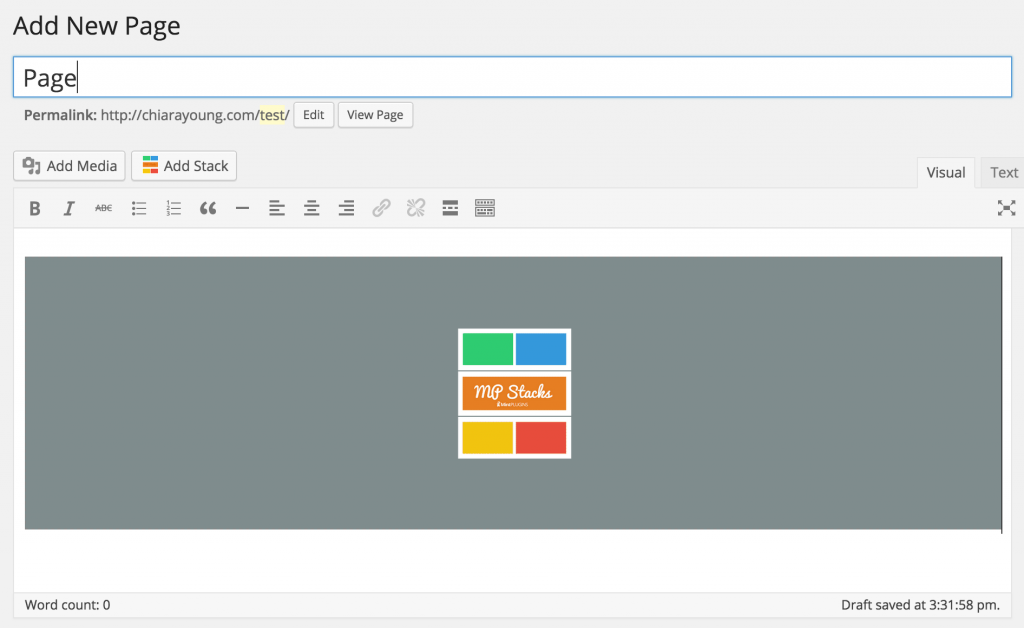
Make a new Stack by clicking on the “Add Stack” button above the text area on the page editor. The button looks like this:

If you’ve already added a Stack to your page you can, of course, skip step 4.
Step 5.
Once you’ve added a new Stack to the page, view the page by clicking “View Page” at the top of your screen.
Step 6.
For new Stacks click “Add a Brick to this Stack”. It will look like this:

If you have already created Bricks in this Stack, open the Brick Editor by clicking “Edit Brick.
Step 7.
In the Brick Editor, which is now open on your screen, under “First Content-Type”, choose “MailChimp”.
Step 8.
You will now see some options for your MailChimp information. Click “Find Your MailChimp API Key Here” to quickly locate your API Key (Make sure you are logged into MailChimp). Then paste the key into the Brick Editor.
Step 9.
Create a “List” in MailChimp. You can do this by going to MailChimp and logging in. Then at the top click on “Lists” > “Create List”. Call the list something like “Song/File Name X Download”. You want the name of this list to correspond with the action the user is taking so they understand.
Step 10.
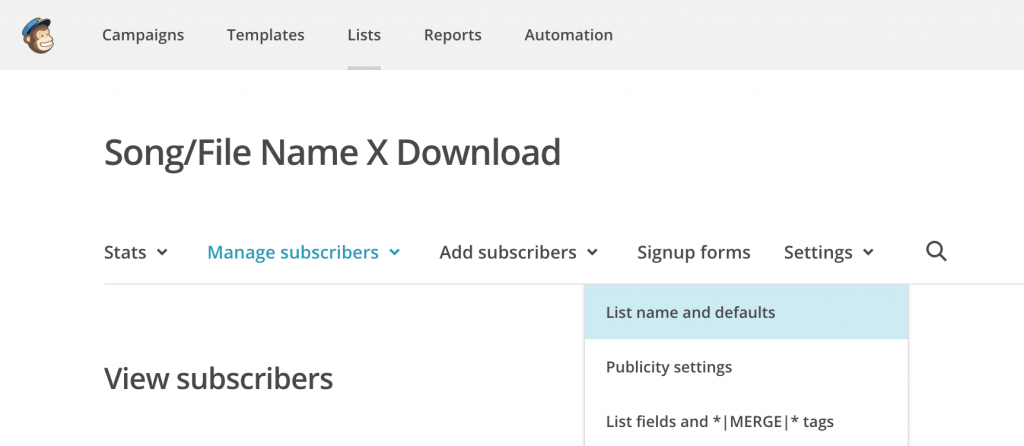
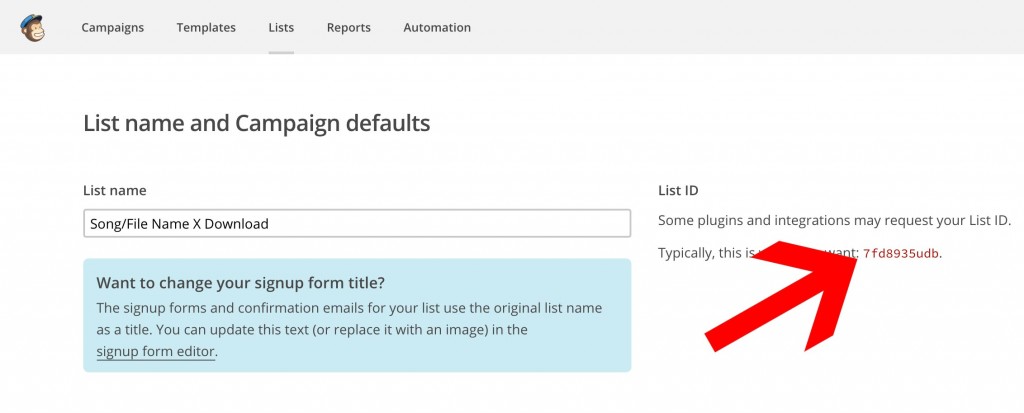
Locate the list ID. The list ID is easy to locate. Go to “Lists” > Select your list > “Settings” > “List Name and Defaults”. It looks like this:
Step 11.
Copy the List ID and paste it into the Brick Editor. You can also start to design the Brick the way you’d like by adding a Background Image/Color under the “Background Settings” on the top right. When you are ready, click “Update/Publish” on the very top right side of the Brick Editor.
Step 12.
Create a new Page in WordPress by going to “Pages” > “Add New”. This page will be a “secret” page that your new subscribers will be automatically sent to when they sign up. It is on this page where we’ll “give” them the Song/File. Call the page something like “Thanks for Subscribing!”. You can then click the “Add Stack” button to place a new Stack on this Page.
Step 13.
View the page you created in Step 12 by clicking the “View Page” button at the top of the page and then Add a new Brick to the Stack. In this brick, under “Content-Type 1”, we’ll choose “Text”. In the text area we’ll write something like “Thanks for Subscribing. Here’s is your file download”. Then, we’ll click “Add Another” at the bottom of the text area to add another Text Area. In that area, we’ll upload the file we want to give the user and insert it into the text area using the “Add Media” button just above the text area. When we’re done all that, click the “Update button at the top right of the Brick Editor.
Here’s a sample of the “Thanks for Subscribing” page I made in 2 minutes with MP Stacks:

Step 14.
Now we have the “Secret” page which will deliver the file to the new subscribers – but how do the new subscribers get here? It’s pretty simple. Go back to your MailChimp dashboard and select the List we have been using by clicking on “Lists” at the top of the page and then selecting our list. Now, click on “Signup Forms” > “General Forms”. Find the form called “Confirmation ‘Thank You’ Page”. It looks like this:
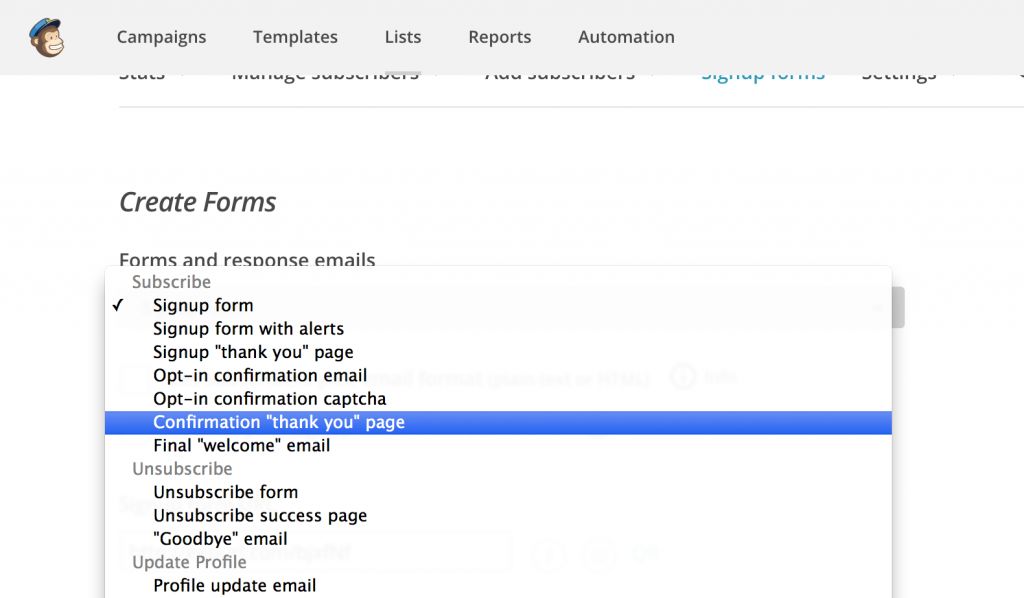
Once we click on that, you’ll see an option that says: “Instead of showing this thank you page, send subscribers to another URL”. In that field, copy/paste the URL of the page we created in Step 12.
Step 15 (Optional & Advanced).
At this point everything is done and working! Congratulations on a job well done.
Now, if you are slightly more advanced and want to block Google from “indexing” your secret page (from Step 12), open your FTP and go to your WordPress’s root directory (the place where the wp-content, wp-admin, and wp-includes directories sit). In here we need to create/modify the “robots.txt” file to tell Google (and other search engines) that we don’t want our secret page to be indexed. If the “robots.txt file exists there, open it for editing. If it doesn’t exist, make a new file and call it “robots.txt” and open it.
Now locate the “slug” of your secret page by going to “Pages” > your secret page. The slug is located just beneath the Page Title field and looks like this:

In that robots.txt file we need to add this line:
Disallow: /thanks-for-subscribing/
Then save that file in your WordPress root directory and Google won’t index our secret page.
And there you have it! This has been a great way for both myself, customers, and friends to grow their email lists.




 If you’re someone who’s purchased a WordPress theme before, you might relate to this experience: You see a theme that looks great in the demo before you purchase. However, once you install the theme, you realize that all of the great photography that you saw in the demo doesn’t come with the theme – and it’s looking pretty darn plain!



 Getting people to sign up for your mailing list is imperative to your online growth – whether you are a musician, artist, or business. Social Media accounts like Twitter, Instagram, and Facebook are also very important. But don’t overlook the incredible value that an email list can have – especially when the people on your email list WANT to get emails from you.


