A question we get asked quite often is how to incorporate a Paypal donation button into a theme, MP Stacks (our Page Builder), or into a navigation menu.
The main thing here is that you will actually want a donation URL – as opposed to a “Button”. The reason is that we want something fancy and something that matches your theme design – not necessarily Paypal’s button (which likely won’t match the design of your theme/website).
The first thing to do is generate the donation button in your Paypal account. Do this by going to this URL (make sure you are logged in):
https://www.paypal.com/us/cgi-bin/webscr?cmd=_xclick-donations-factory
For now, use the option to use “Paypal Button”.

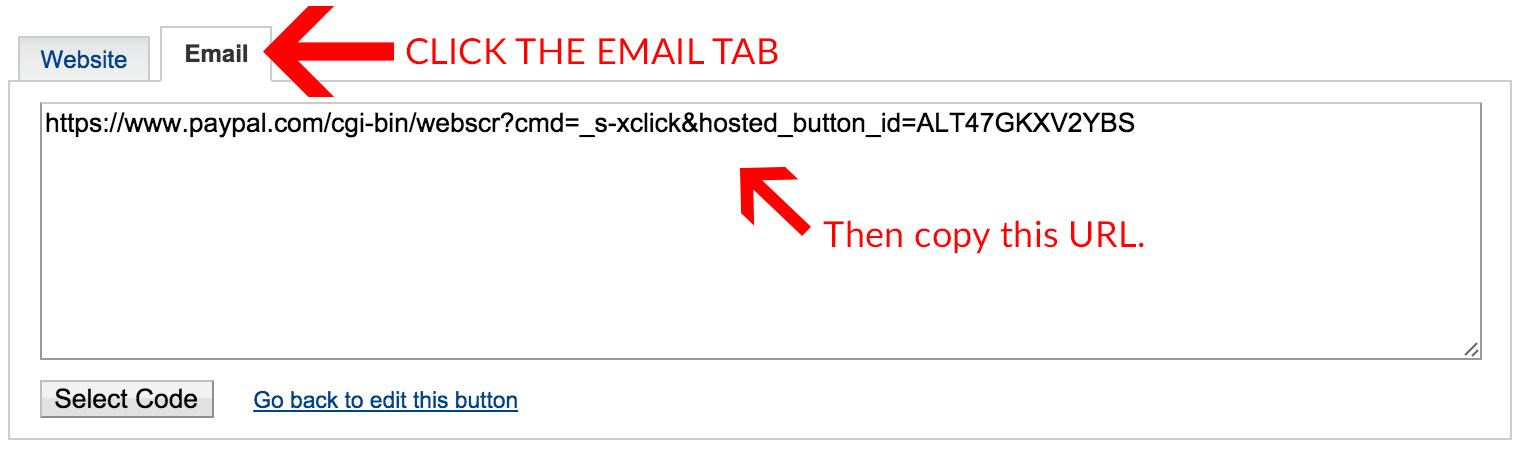
Now, click “Create Button” at the bottom of the screen. Change the result to the “Email” Tab and copy the URL.
Setting up the button in WordPress using MP Stacks.
Now that we have the button URL, we can create a button in MP Stacks. If you don’t know how to create a Stack, check out this tutorial to create your first Stack. If you already have some Stacks and Bricks set up (if you use one of our Theme bundles for example), then you are already all set.
All you need to do now is Edit a Brick (Double Click on the Brick to open the Brick Editor). Now, set one of the Content-Types to be “text”. Just above the text area you’ll see an option to “Add Button”. Click that. Now you’ll see a diolog box which lets you create the button itself. You can choose an icon, write the text you’d like on the button (something like “Click Me!”), and the URL that button will go to when clicked. Here, enter the URL you copied from Paypal. When you’re done all of that, insert the button into the text area and update the Brick. You can also set custom colors for the button if you like.
Just like that, you now have a totally customized button which matches your website and takes the user to Paypal. Because you are using MP Stacks, you can surround the button with useful text, titles, use custom fonts, and much more!